


3 Simple Steps to Connect Google Analytics 4 (GA4) to Shopify
Table of Contents
Google Analytics 4 (GA4) is essential for understanding your Shopify analytics tracking—but as of 2025, Shopify has migrated GA4 tracking to a new feature called Customer Events. That means you no longer need to manually add your GA4 tag to the theme.
This guide will walk you through the updated method of connecting GA4 to Shopify using Customer Events and explain what to do if you haven't set up a GA4 property yet.
In this blog:
How to add Google Analytics to Shopify?
Step 1: Get Your GA4 Measurement ID
Need to create a GA4 property first? Here’s an easy guide to set it up:
1. Log in to Google Analytics
Open analytics.google.com and sign in with the Google account you use for your business.
2. Create a New Property
- In the bottom-left corner, click Admin.
- Under the Account column, select your account (or click Create Account).
Under the Property column, click Create Property. - Enter a name (like “MyShopifyStore GA4”), choose your reporting time zone and currency, then click Next → Create.
3. Set Up a Web Data Stream
- After creating the property, select Web as the platform.
- Enter your store’s URL (e.g., https://www.yourstore.com) and give it a name (“Shopify GA4 Stream”).
- Click Create stream.
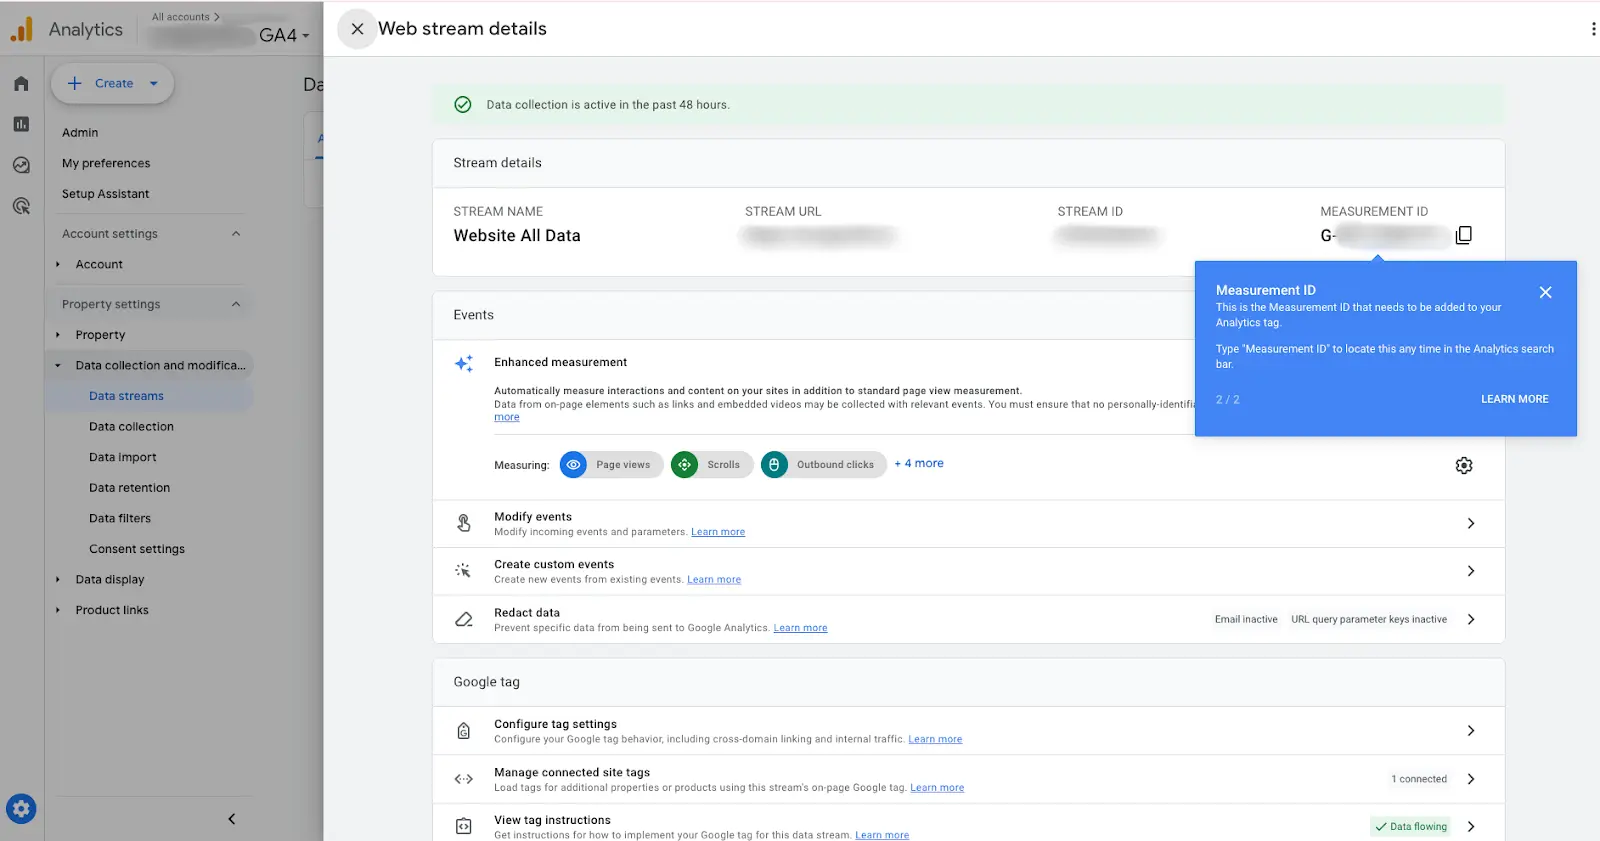
4. Copy Your Measurement ID
- On the Web stream details page, copy the Measurement ID (it looks like G-XXXXXXXXXX).
- Keep this handy—you’ll paste it into Shopify in Step 2.
If you already have a GA4 property, here are steps to find your measurement ID:

- Go to analytics.google.com and log in
- Click your GA4 property
- In the left sidebar, click Admin
- Under the Property column, click Data Streams
- Select your Web data stream
- Copy your Measurement ID (it starts with G-XXXXXXX)
Step 2: Add GA4 via Customer Events in Shopify
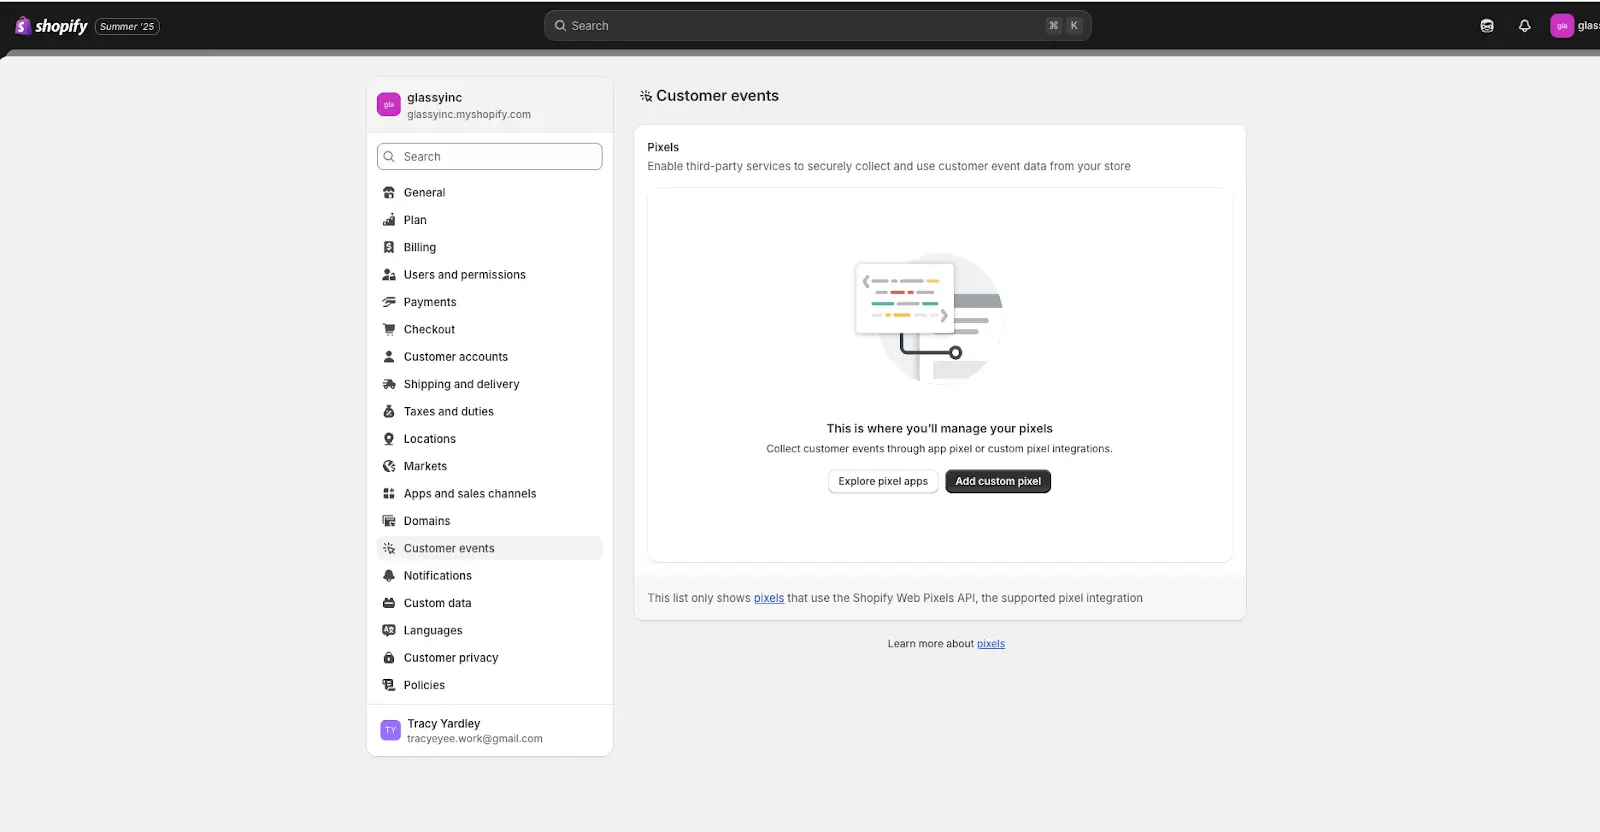
- In Shopify Admin, go to Settings > Customer Events
- Click Google Analytics 4 under the “Custom Pixels” section
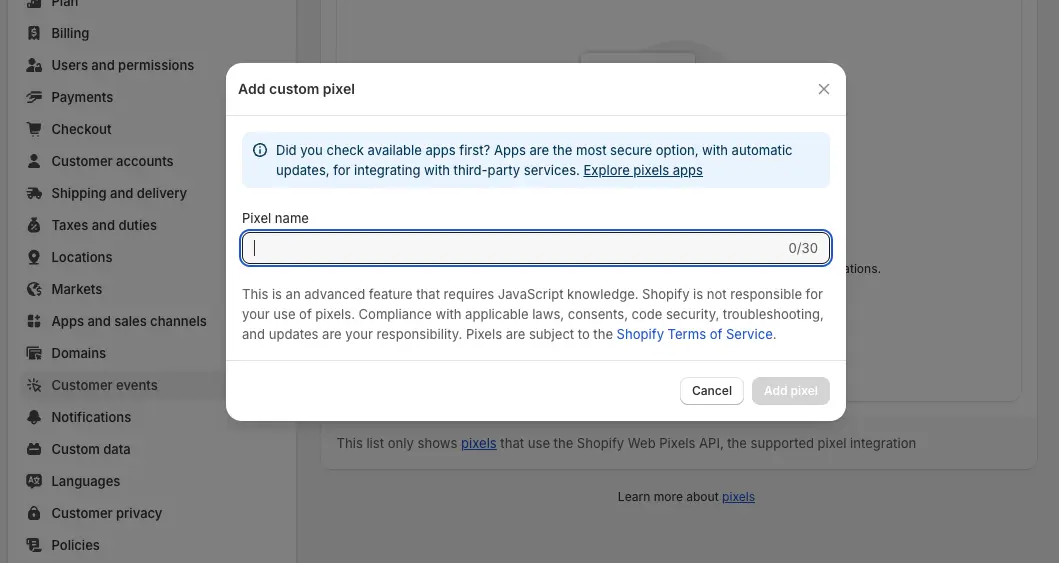
- Paste your Measurement ID
- Save the changes
Shopify automatically handles most event tracking, such as page views, add-to-carts, and purchases.
Step 3: Verify Your Setup
- Use GA4’s Realtime Report
- In GA4, click Realtime.
- Visit your Shopify store in a new tab and navigate pages. You should see your activity appear instantly.
- Test an Order
- Place a low-value test order on your store.
- In GA4’s Engagement > Events report, look for the purchase event and verify the revenue matches your test order.

Best Practices for Having Shopify Google Analytics
1. Avoid Double Tracking
If you switch from the native Shopify integration to Google Tag Manager (or vice versa), make sure to remove the old script or Measurement ID to avoid duplicate data.
How to check: In GA4’s DebugView, see if each action (like “page_view”) appears only once per page load. If you see duplicates, check your store theme and GTM setup.
2. Data Delay Is Normal
GA4’s standard reports take up to 48 hours to show data. Only Realtime and DebugView update immediately. Don’t panic if yesterday’s orders aren’t showing just yet.
3. Complement GA4 with Ecommerce-Focused Tools
While GA4 gives you deep behavioral insights, it doesn't show real profit after expenses, ad costs, or shipping. For a complete financial picture of your Shopify store, many merchants pair GA4 with best Shopify apps for analytics like TrueProfit to track real-time profit, cost of goods sold, and net profit margins. It helps bridge the gap between what users do and how much each action is worth.


Irene Le is the Content Manager at TrueProfit, specializing in crafting insightful, data-driven content to help eCommerce merchants scale profitably. With over 5 years of experience in content creation and growth strategy for the eCommerce industry, she is dedicated to producing high-value, actionable content that empowers merchants to make informed financial decisions.